Introduction Peanut Chikki Recipe : The Charm of Winter, Peanuts, and Chikki
Friends, there’s nothing quite like the pleasure of munching on peanuts while basking in the winter sun. And if those same peanuts are combined with jaggery to create a crispy, delicious chikki, then what more could you ask for? Friends, ‘chikki’ is a traditional Indian sweet that is not only incredibly delicious but also a powerhouse of energy. It’s a ‘superfood snack’ that is loved by children, adults, and young people alike. Today, we will teach you a simple, perfect, and guaranteed recipe for homemade peanut chikki, after which you won’t even miss the store-bought version.
From the Expert’s Pen: (Peanut Chikki)
Our expert, Auntie Ji, who has been making traditional sweets for the past 40 years, says: “Chikki is not just a recipe, but an emotion. The balance between the jaggery and the crispness of the peanuts is crucial. One wrong step, and the chikki will either become too hard or not chewy enough. Friends, the chikki available in the market these days, made with sugar, is not good for your health. Real chikki is made only with jaggery and desi peanuts, which provide warmth and instant energy to the body during winter.” Preparation: Ingredients and Equipment
Read More: 5-Star Banana Bread Pudding Recipe: The Ultimate No-Fail Dessert
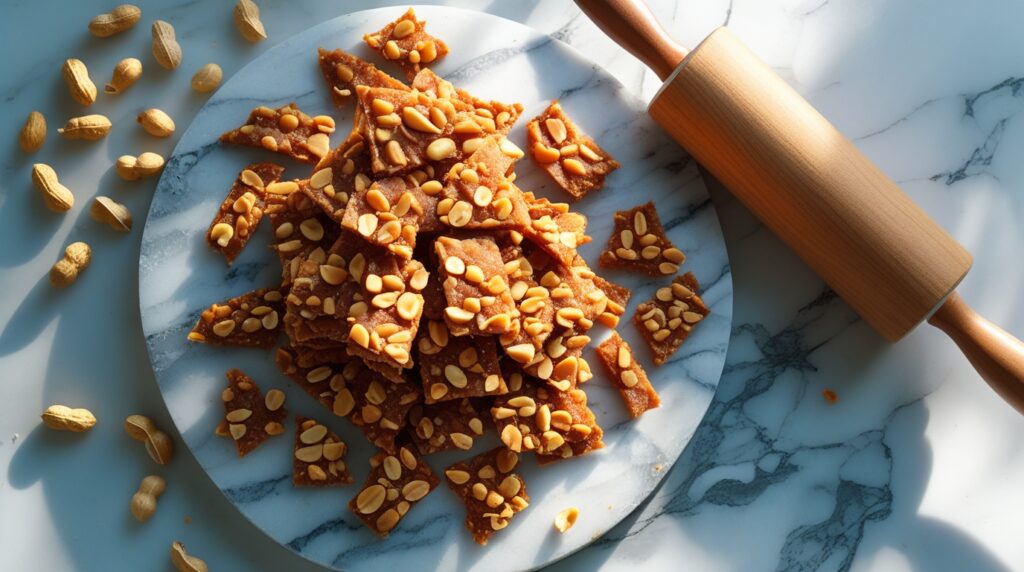
Table of Contents
Ingredients (for approximately 15-20 medium-sized Peanut Chikki):
Peanuts – 2 cups
Jaggery – 1 cup, finely chopped
Ghee – 1 teaspoon (for greasing, also enhances flavor)
Cardamom powder – ½ teaspoon
Equipment: (For Peanut Chikki)
Heavy-bottomed pan
Rolling pin
Flat plate or marble slab
Knife or pizza cutter
Read More: Smoky 20-Minute Dragon Chicken Recipe: The Spicy Takeout Fakeout!
Step-by-Step Recipe: The Magic of Making Crispy Peanut Chikki
Step 1: The Peanut Transformation (Roasting and Peeling)
Friends, dry roast the peanuts in a pan over medium heat (without oil).
Keep stirring continuously, otherwise, they will burn. When the peanuts become fragrant and develop light brown spots, remove them from the heat.
Now, place them on a clean cloth and let them cool. Then, rub the cloth to separate the peels.
Now, remove the peels and separate the peanut kernels. You can lightly crush them to break them into larger pieces if desired.
Auntie’s Tip: Friends, don’t over-roast the peanuts, otherwise, the chikki will become bitter. The peel comes off easily only when they are cool.
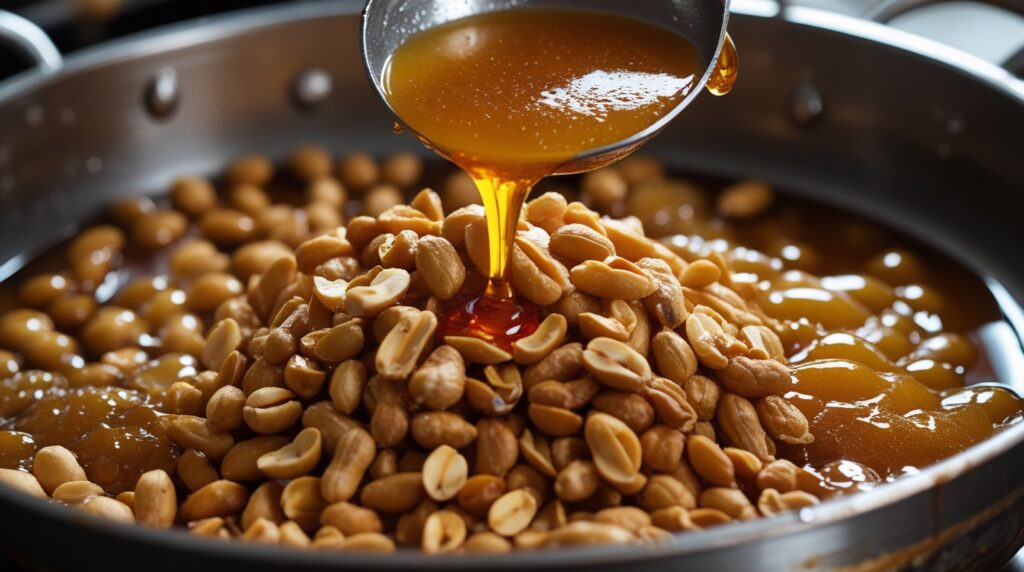
Step 2: The Golden Syrup (Making the Jaggery Syrup)
Friends, heat 1 teaspoon of ghee in the same pan.
Then add the grated jaggery and let it melt over medium heat. Stir continuously.
Friends, when the jaggery is completely melted and starts to boil, let it boil for 4-5 minutes. This is the most important step!
How to check the syrup?
Friends, take some cold water in a bowl. Drop a drop of the jaggery syrup into the water with a spoon. If the drop forms a hard ball without spreading and you can break it with a crisp sound by pressing it with your fingers, the syrup is ready. This is called the ‘hard ball stage’. If the drop remains soft, cook it a little longer.
Read More: The Ultimate 5-Step Paneer Butter Masala Recipe: Crack The Code to Restaurant-Perfect Bliss
Step 3: ‘The Festival of Union’
Now, turn off the gas.
Then immediately add the roasted peanuts and cardamom powder and mix quickly so that each peanut is well coated in the jaggery syrup.
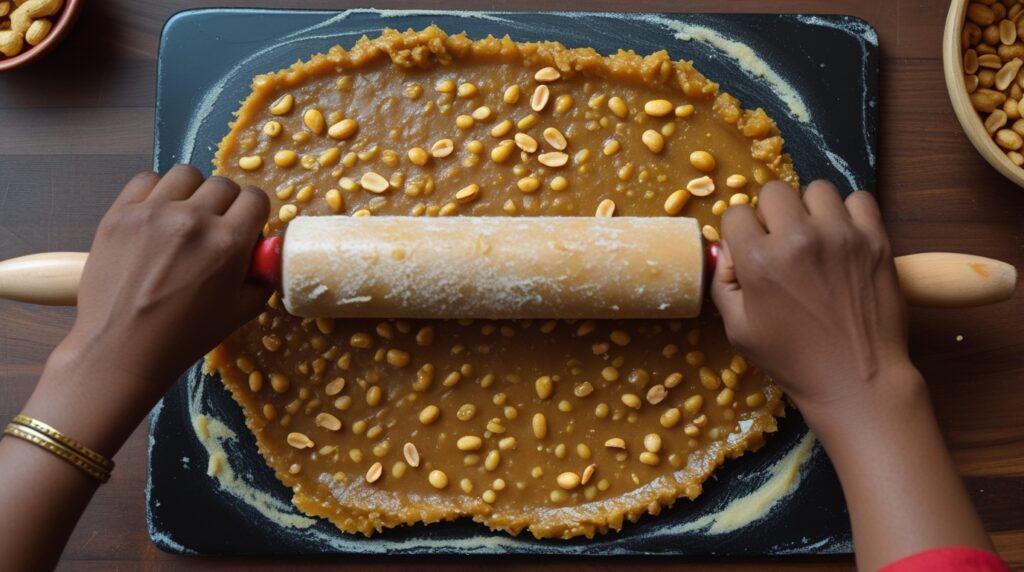
Step 4: ‘Shaping and Setting’
Immediately pour the mixture onto a greased plate or marble slab.
Roll it out as thinly as possible using a greased rolling pin.
While it’s still warm but starting to set, make chikki-shaped markings with a knife or pizza cutter (do not cut all the way through).
Let it cool completely (approximately 30 minutes).
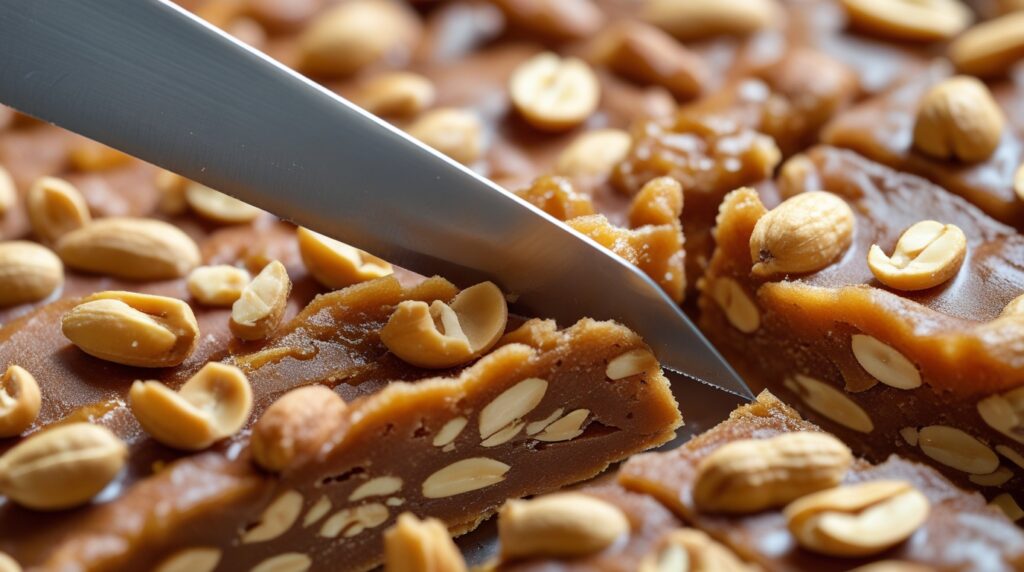
Step 5: ‘The Final Immersion’ (Breaking and Storing)
Once completely cooled and hardened, break the chikki pieces along the markings with the help of a knife.
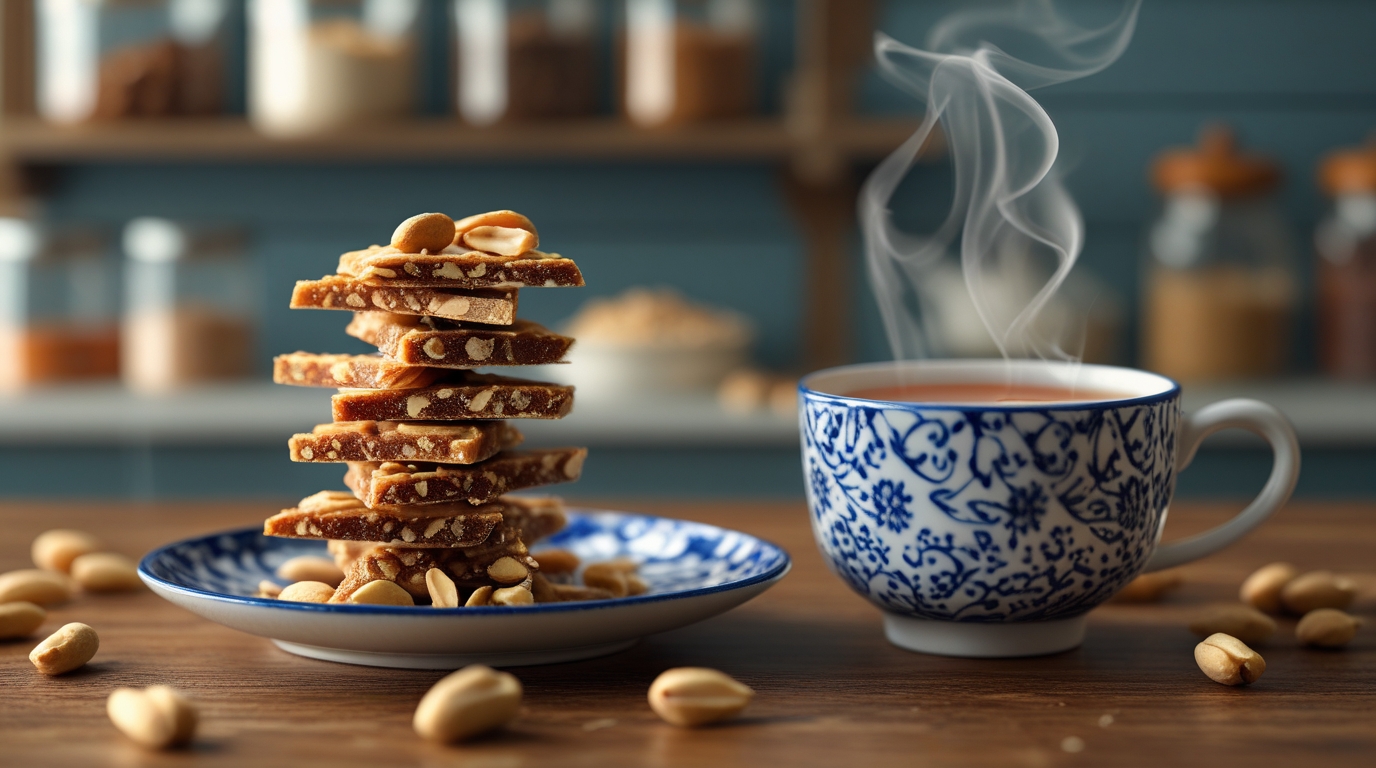
Store in an airtight container. It easily lasts for 2-3 weeks.
Why is this homemade Peanut Chikki beneficial? A health perspective
Natural Energy: Jaggery is rich in iron and minerals, providing instant energy. Peanuts are a source of protein and good fats.
Great Snack for Kids: A much better option than chocolates or toffees full of sugar and preservatives. It’s both nutritious and delicious.
A Remedy for Winter: According to Ayurveda, both jaggery and peanuts provide warmth to the body.
The chikki is too hard/brittle, the syrup was overcooked. Cook it for a shorter time next time.
The peanuts are separating from the syrup, the mixture wasn’t mixed quickly enough, or the peanuts were cold. Mix everything while it’s hot.
Is the chikki sticking? Either not enough ghee was used for frying, or the syrup didn’t reach the correct consistency.
Read More : The 5-Minute Paneer Bhurji Recipe Revolution: Your Ultimate Lazy-Day Feast!
Conclusion: Simplicity holds the most precious flavor.
Friends, making peanut chikki is a loving, easy, and satisfying experience. It’s not just a sweet treat, but a piece of our traditional culinary heritage. By trying this recipe, you’ll not only prepare a healthy snack but also give your family the gift of natural sweetness. So what are you waiting for? This winter, head to the kitchen, get out your pan, and create this magic of peanuts and jaggery with your own hands. The aroma and taste will make you forget everything else.